How to do Kitchener Stitch with out Kitchener(ing)
Here it is folks, the probably not at all highly anticipated directions for the two other knitters out there who can't do Kitchener Stitch without it looking like it was done by ferrets. Disclaimer: this is not my idea, this is probably one of those "Unventions" EZ talks about. It is also so easy, you'll wonder why you haven't tried it before. I am showing it here with socks, but I've also used it on cables (the hood of Rogue to be exact) and it works flawlessly. To do this, you'll need a yarn needle and some waste yarn that is the same weight as the yarn in your project but a different color. Cotton yarns work best as they are less likely to stick to the wool (assuming you've knit the project in wool in the first place), but keeping the weight the same is more important than fiber content - I used a wool in these pics because I don't have a fingering weight cotton. Color contrast is crucial. OK, here goes:

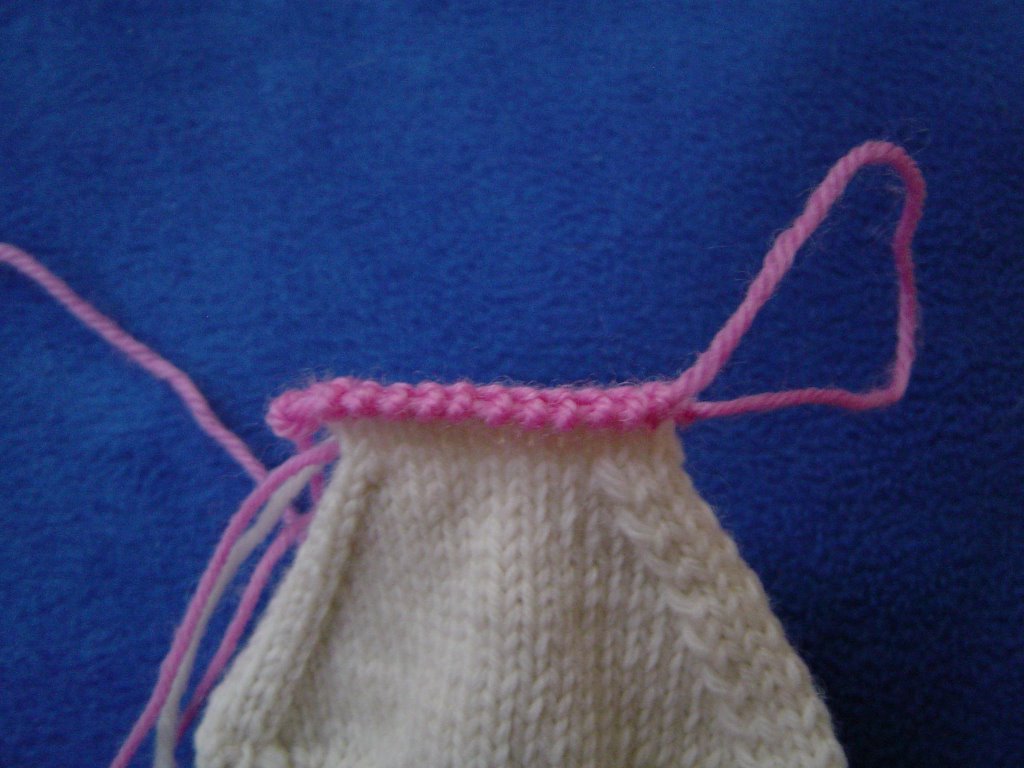
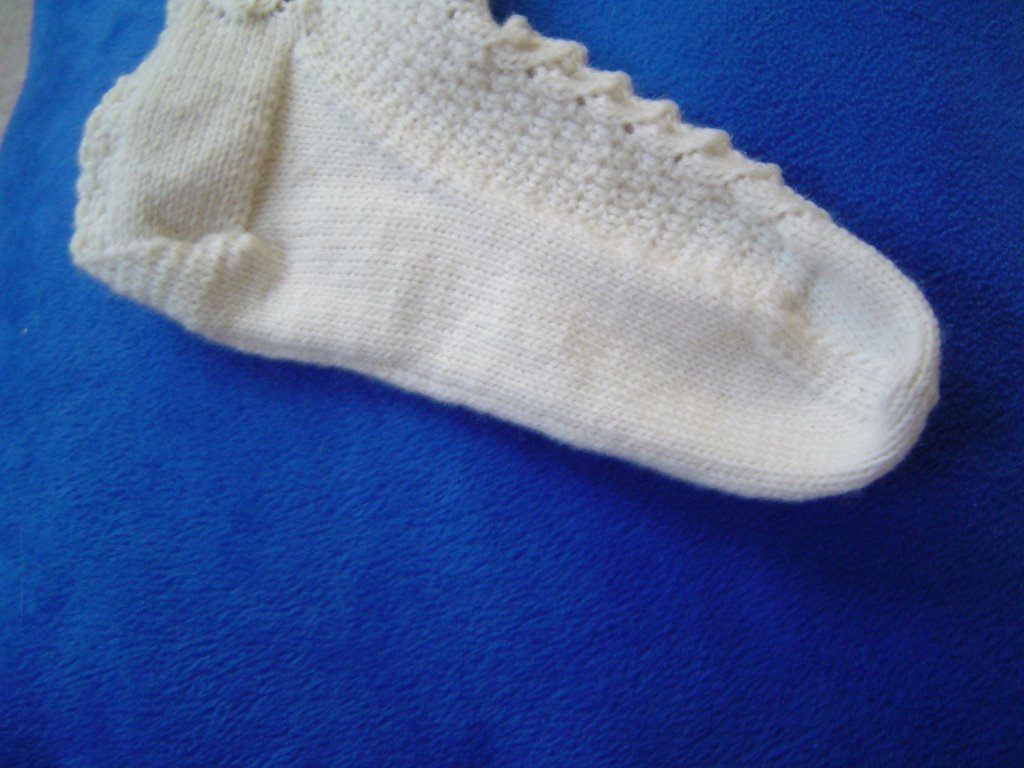
1. Above you see the second Snow Dragon Who Ate the French Child sock (pattern: French Child's Sock from Knitting Vintage Socks by Nancy Bush). It is to the point where the directions say to Kitchener stitch the stitches together to finish the toe - yeah right - if I want my sock to look like it was done by ferrets! I have broken the sock yarn from the ball, leaving about a 2 foot tail attached to the sock.

2. Ignoring the crazy Kitchener Stitch directions, I work two rounds (if you're knitting in a pattern, continue in that pattern so it matches) with the contrasting yarn- you can see the tails hanging out to the side - don't weave them in, knot them, or do anything else with them, just hold them until you have three or four stitches done and don't have to hold them anymore. Just let them hang there - the ferrets won't bother them.


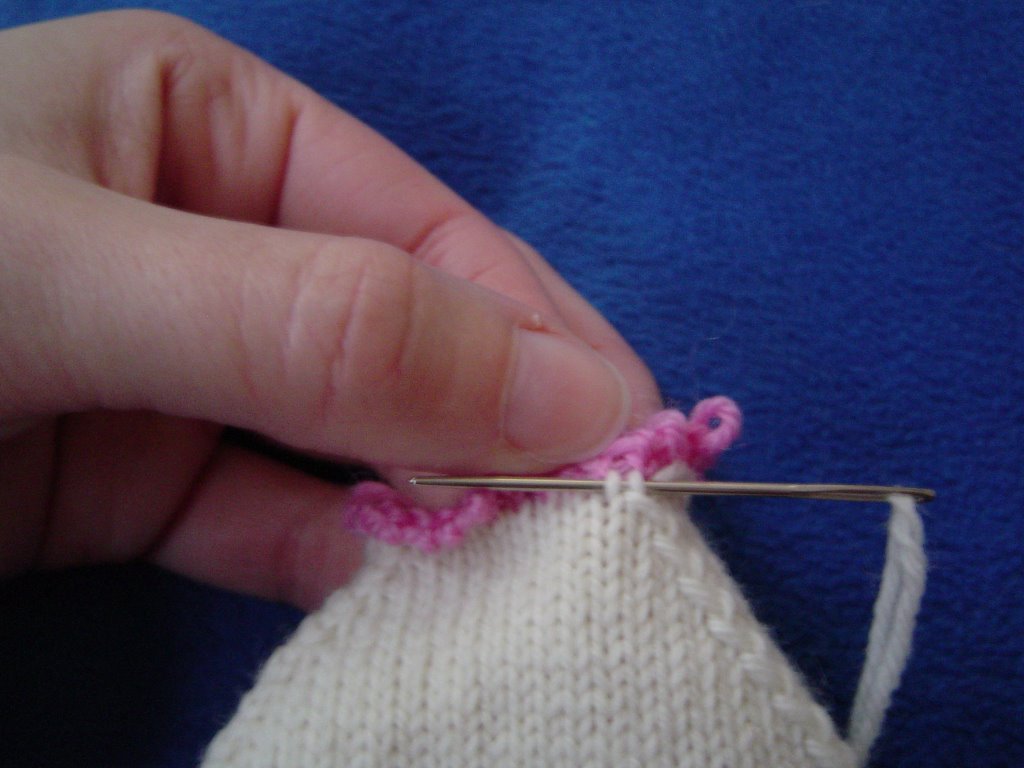
3. Thread the end of the contrasting yarn into a yarn needle and run this through the stitches on the needle, sliding the stitches off of the needle. Basically, you're using the tail of the yarn to hold these live stitches. I like to leave a loop between the needles (referred to as the front needle and the back needle by those who can actually do Kitchener stitch) so I have something to grab later. You can see the loop on the picture just above this paragraph.

4. Now thread the tail of your project yarn onto the needle. If you look closely at the part of the sock where the project yarn is the yarn below the contrasting yarn, you'll see that you can actually see how the contrasting yarn loops into the project yarn, forming the stitches. Take the needle and follow the contrasting yarn through the stitches of the project yarn (you're only looking at the first round of contrasting yarn here - the second is just there to keep it from unraveling). You'll be going from one side of the opening to the other, only following the contrasting yarn where it loops into your project yarn's stitches.

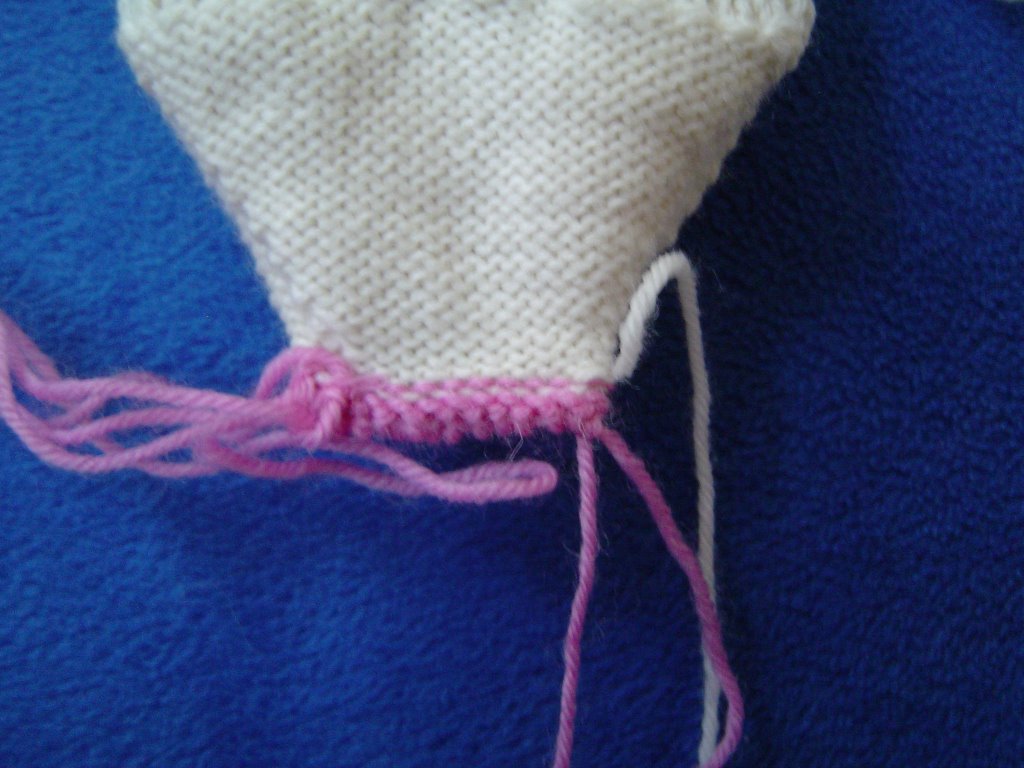
5. As you stitch back and forth across the opening, be sure to pull the stitches as tight as the regular stitches that you knitted so that your knitting and the join you're making are indistinguishable. (I've never typed that word before - its huge!) It helps to tuck the contrasting yarn into the opening to get it out of the way.

6. Once you've gone all the way across the opening, make sure all your stiches are the same size as each other and your knitted stitches. Pass the needle to the wrong side of the project. There might be a dent along the line where you just stitched - don't worry, this is because of the contrasting yarn you worked and then stuffed into the opening. Once its removed it won't be a dent.

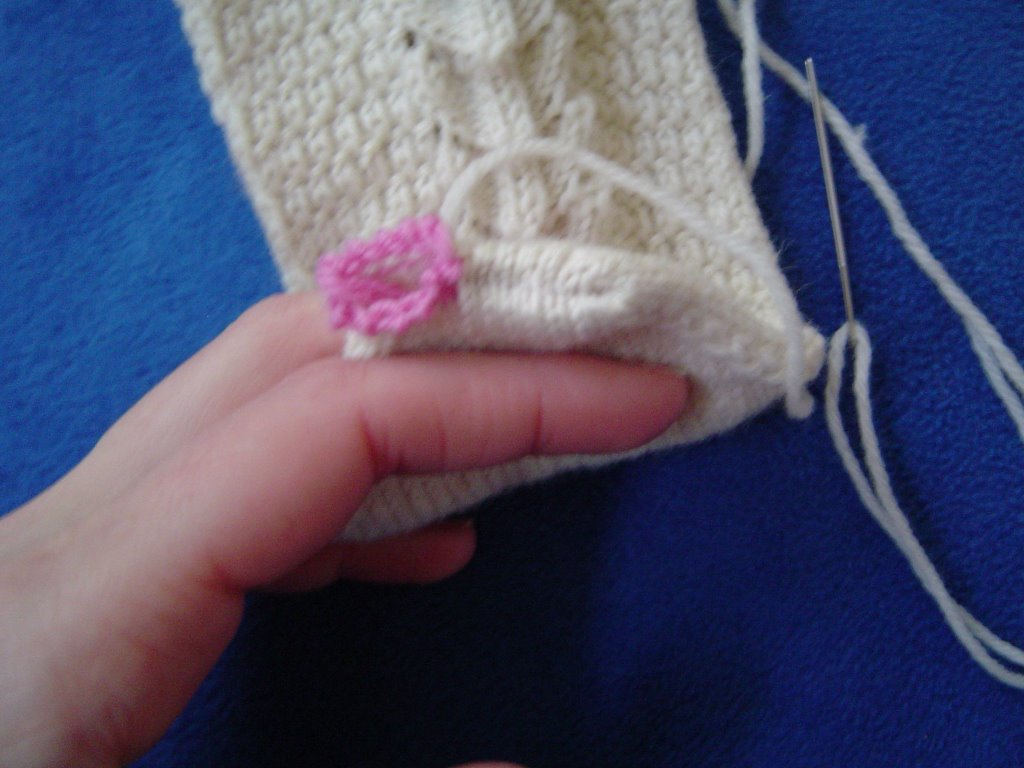
7. Above you can see the inside of the sock. The contrasting yarn is all on the inside now, the yarn tail from the project yarn is also inside and is still on the needle. Now, grab the loop of contrast yarn you left between the two needles when you put the live contrast stitches on it. Pull it out, then pull the other side out. You should now have a bunch of live stitches in your contrasting yarn. Keep pulling and it should just unravel from the project yarn. When all of the contrast yarn is unraveled, weave in the end of the project yarn, just like you would if you actually knew how to do Kitchener stitch, trim the end and turn the sock right side out.

TA DA! A finished sock (or whatever you're making)! And I still don't know how to do Kitchener Stitch.

1. Above you see the second Snow Dragon Who Ate the French Child sock (pattern: French Child's Sock from Knitting Vintage Socks by Nancy Bush). It is to the point where the directions say to Kitchener stitch the stitches together to finish the toe - yeah right - if I want my sock to look like it was done by ferrets! I have broken the sock yarn from the ball, leaving about a 2 foot tail attached to the sock.

2. Ignoring the crazy Kitchener Stitch directions, I work two rounds (if you're knitting in a pattern, continue in that pattern so it matches) with the contrasting yarn- you can see the tails hanging out to the side - don't weave them in, knot them, or do anything else with them, just hold them until you have three or four stitches done and don't have to hold them anymore. Just let them hang there - the ferrets won't bother them.

3. Thread the end of the contrasting yarn into a yarn needle and run this through the stitches on the needle, sliding the stitches off of the needle. Basically, you're using the tail of the yarn to hold these live stitches. I like to leave a loop between the needles (referred to as the front needle and the back needle by those who can actually do Kitchener stitch) so I have something to grab later. You can see the loop on the picture just above this paragraph.
4. Now thread the tail of your project yarn onto the needle. If you look closely at the part of the sock where the project yarn is the yarn below the contrasting yarn, you'll see that you can actually see how the contrasting yarn loops into the project yarn, forming the stitches. Take the needle and follow the contrasting yarn through the stitches of the project yarn (you're only looking at the first round of contrasting yarn here - the second is just there to keep it from unraveling). You'll be going from one side of the opening to the other, only following the contrasting yarn where it loops into your project yarn's stitches.
5. As you stitch back and forth across the opening, be sure to pull the stitches as tight as the regular stitches that you knitted so that your knitting and the join you're making are indistinguishable. (I've never typed that word before - its huge!) It helps to tuck the contrasting yarn into the opening to get it out of the way.

6. Once you've gone all the way across the opening, make sure all your stiches are the same size as each other and your knitted stitches. Pass the needle to the wrong side of the project. There might be a dent along the line where you just stitched - don't worry, this is because of the contrasting yarn you worked and then stuffed into the opening. Once its removed it won't be a dent.
7. Above you can see the inside of the sock. The contrasting yarn is all on the inside now, the yarn tail from the project yarn is also inside and is still on the needle. Now, grab the loop of contrast yarn you left between the two needles when you put the live contrast stitches on it. Pull it out, then pull the other side out. You should now have a bunch of live stitches in your contrasting yarn. Keep pulling and it should just unravel from the project yarn. When all of the contrast yarn is unraveled, weave in the end of the project yarn, just like you would if you actually knew how to do Kitchener stitch, trim the end and turn the sock right side out.
TA DA! A finished sock (or whatever you're making)! And I still don't know how to do Kitchener Stitch.
posted by Melanie at 9:05 AM
![]()


11 Comments:
Very clever! I've not seen that technique before.
I love it!!! off to try it on some socks that are waiting to be finished..... thanks
That is *brilliant*! Necessity is the mother of unvention. I'm passing this along to the knit-group members who groan at the idea of kitchenering (giving you all the credit, of course). Thank you for posting that!
Well, slap me upside the head! Friggin' brilliant! The last time I tried to kitchener anything, it took me 2 dang hours to finish 16 lousy stitches. I love you for posting these directions! Now I can fix those mittens that are too long...
You mean that's not really kitchenering stitches? That's how I always do it when I've removed my socks from the CSM (waste yarn following the "real" sock). It's a lot easier than steaming, etc. as I've tried that route and it did look like my socks had ears. Go figure, I guess I'm added to the "don't know how" category.
Take care,
Jen
Wow ... thanks! i'll have to try this out the next time I have to do kitchener stitch . . .
Great directions, thanks for posting. I think there's a knitting continuum where all ideas knitting live and we just have to reach up and grab them because I found that same technique a few years ago at this site: http://www.tradewindknits.com/tbsoctoe.html
It saved my life, well not really my life, but I couldn't figure the Kitchener stitch out without it.
Happy holidays!
Isn't it great when you "unvent" something?! Even when you find out it's already been done, you DID discover it yourself! This technique, on Lucy Neatby's "TradewindKnitwear", sure had made it easy for me too. When I took a class from her, she made us join the shoulders that way, as well as joining the sleeves to the sweater with that technique and on socks too. It sure makes it look a whole lot more professional! Lucy likes to do it from the centre out, to avoid those 'ears'.
Great Job! I hate trying to Kitchener and every time I do it, mine looks SOOOO wrong. I'm going to try your technique soon.
Thank you for these instructions. It's a genius cheat (is it really a cheat?) and very well explained. You rescued me from a very big headache :o)
Very cool! It's a lot like Lucy Neatby's sock toe chimney technique:
http://www.tradewindknits.com/tbsoctoe.html
...but I like yours better because you don't have to start in the middle of the toe. Fewer ends to weave in! Thanks. :)
Post a Comment
<< Home